How to make your own chutney
Search:
How to make your own chutney
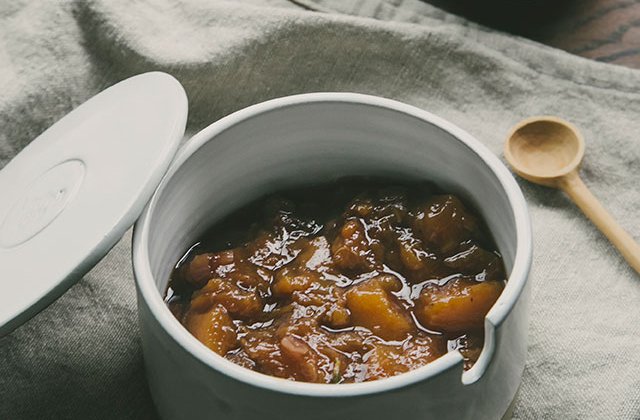
Don’t buy, DIY! This beautiful winter chutney pairs beautifully with slow food, and it’s so simple you’ll never buy chutney again!
Kate Walsh from Real Food Projects shares her love for home cooking and her delicious chutney recipe to try at home.
"I love making chutney because it is a perfect lesson for living a slow food life. Chutney has always been made with seasonal fruits that seem to belong together - pears and apples in winter, or peaches and plums in summer. And while it doesn’t take too long to make, you can’t eat it for a few weeks while you wait for the flavours to really mature. Sorry, no Internet-age instant gratification here! Grab some apples and pears from your local farmers market this weekend and spend an afternoon in the kitchen and you will be rewarded," she says.
"I started my business, Real Food Projects – a cooking school based in Brisbane and Byron bay – with the very specific goals of connecting people to the story behind their food and sharing the skills to get back into the kitchen to cook from scratch. We have been sold the idea that cooking your own food is too hard, too expensive and too time consuming. However, it’s one of the most important ways we can start to fix our broken food system, and it’s a serious amount of fun!"
You’ll need...
- 4 x 280ml jars with lids – sterilised (see page 74)
- Large heavy-based saucepan
- Wooden spoon
- Ladle or large spoon
- Paper towel
Ingredients (Makes approximately 4 x 280ml jars)
- 1 kg cooking apples and pears (a mix of both)
- ½ lemon
- 2 brown onions, peeled and chopped
- 2 garlic cloves, peeled and chopped
- 375 ml (1 ½ cups) apple cider vinegar
- 1 ½ cups lightly packed brown sugar
- 170 g (1 cup) raisins
- 1 fresh or dried bay leaf
- 1 fresh medium heat chilli, seeded and finely chopped
- 1 tbsp black mustard seeds
- 1 cinnamon stick
- 1 tbsp ground ginger
- 3 cloves
Method
1. Chop
Core and roughly chop the apples, pears and lemon (including the lemon rind). If you don't like the idea of pear or apple skin in your chutney, feel free to peel your fruit first – I chose to leave it on for this recipe.
2. Cook
Add all the ingredients, including the spices, to a heavy-based saucepan and gently bring to the boil. Reduce the heat and simmer for 1 to 1 ½ hours, or until the apples and pears have broken down and the chutney is dark brown.
3. Check
The chutney is ready when it holds its shape when you move a wooden spoon through it – if any liquid runs in behind the spoon, keep cooking for a few more minutes.
4. Cool and bottle
Remove from the heat and allow to cool in the pan for 15 minutes. Once cool, ladle the chutney carefully into warm jars, leaving a 1-centimetre gap at the top of each jar. Wipe the rims clean with paper towel, screw the lids on and leave to cool.
How to sterilise jars
When making small batch chutney such as this, the easiest method is to place your jars and lids in a saucepan of simmering water for 2 to 5 minutes. Very carefully remove and place upside down on a tea towel to air dry but fill while still warm. Once filled, you will know if your jars are sealed if the lids make a popping sound. After an hour or two the lids should be concave.
Cooks notes
Leave the chutney for about 1 to 2 weeks before using – this allows the flavours to mellow and it’s well worth the wait. This chutney will keep for up to 6 months.
Photography by Kate Holmes.